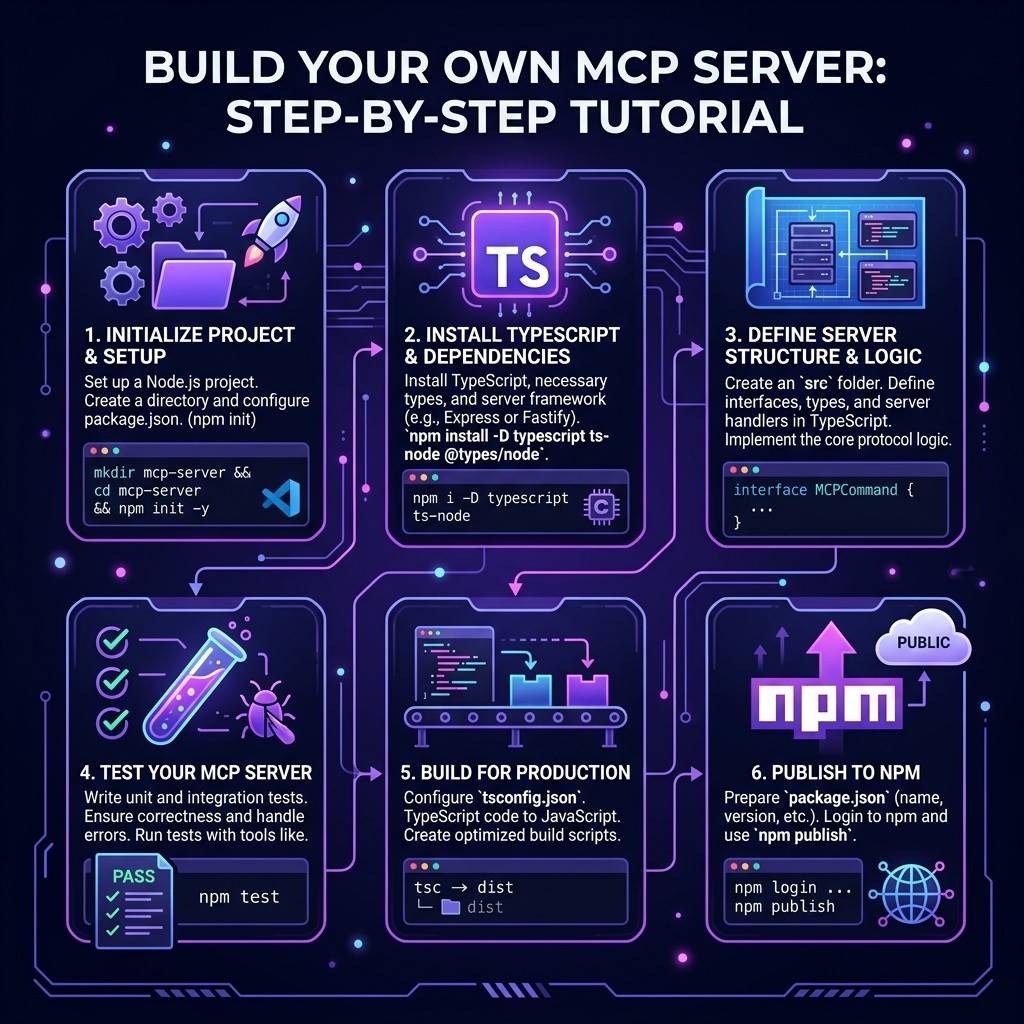
How to Build an MCP Server in 10 Minutes (TypeScript Tutorial)
Step-by-step TypeScript tutorial for building an MCP server from scratch. MCP SDK setup, tool definitions, testing with MCP Inspector, and publishing to npm.

How to Build an MCP Server in 10 Minutes (TypeScript Tutorial)
Sarah Walker · Senior AI Research Editor · March 26, 2026 · 15 min read
TL;DR
You are going to build a fully functional MCP server in TypeScript, test it with the official MCP Inspector, connect it to Claude, and (optionally) publish it to npm. The entire process takes about 10 minutes for the basic version. Here is what we will cover:
- Minutes 0-2: Project setup and MCP SDK installation
- Minutes 2-5: Define your server and add tools
- Minutes 5-7: Test with MCP Inspector
- Minutes 7-10: Connect to Claude Code and Claude Desktop
- Bonus: Publish to npm and list on Skiln.co
No prior MCP experience required. You should be comfortable with TypeScript and npm.
Table of Contents
- What You Are Building
- Prerequisites
- Step 1: Project Setup
- Step 2: Create the Server Skeleton
- Step 3: Add Your First Tool
- Step 4: Add a Second Tool with External Data
- Step 5: Test with MCP Inspector
- Step 6: Connect to Claude Code
- Step 7: Connect to Claude Desktop
- Step 8: Publish to npm
- Step 9: List on Skiln.co
- Going Further: Resources and Prompts
- Frequently Asked Questions
What You Are Building {#what-you-are-building}
We are going to build a "DevStats" MCP server — a tool that gives AI agents access to development statistics. It will have two tools:
get_github_stats— Fetches public repository statistics (stars, forks, open issues) for any GitHub repoget_npm_downloads— Fetches weekly download counts for any npm package
This is a practical server that solves a real problem: when you are evaluating libraries or writing about open source tools, you constantly need to look up these numbers. With this MCP server, Claude can fetch them directly.
By the end of this tutorial, you will understand the MCP server architecture well enough to build servers that connect Claude to any API, database, or service you need. If you want to understand what MCP is at a conceptual level first, read our What is MCP? guide. For the best existing servers, see the top MCP servers for developers.
Prerequisites {#prerequisites}
- Node.js 18+ installed (check with
node --version) - npm or pnpm (I will use npm throughout, but pnpm works identically)
- A text editor (VS Code, Cursor, or Claude Code itself)
- Claude Code or Claude Desktop for testing the finished server
That is it. No databases, no Docker, no cloud accounts.
Step 1: Project Setup (Minutes 0-2) {#step-1-project-setup}
Create a new directory and initialize the project:
mkdir devstats-mcp && cd devstats-mcp
npm init -y
Install the MCP SDK and TypeScript dependencies:
npm install @modelcontextprotocol/sdk zod
npm install -D typescript @types/node
Here is what each package does:
@modelcontextprotocol/sdk— The official MCP SDK from Anthropic. Handles all protocol communication, message framing, and transport.zod— Schema validation library. The MCP SDK uses Zod schemas to define and validate tool inputs.typescriptand@types/node— TypeScript compiler and Node.js type definitions.
Create a tsconfig.json:
{
  "compilerOptions": {
    "target": "ES2022",
    "module": "Node16",
    "moduleResolution": "Node16",
    "outDir": "./dist",
    "rootDir": "./src",
    "strict": true,
    "esModuleInterop": true,
    "skipLibCheck": true,
    "declaration": true
  },
  "include": ["src/**/*"]
}
Update your package.json to add the build script and binary entry point:
{
  "name": "devstats-mcp",
  "version": "1.0.0",
  "type": "module",
  "bin": {
    "devstats-mcp": "./dist/index.js"
  },
  "scripts": {
    "build": "tsc",
    "start": "node dist/index.js"
  }
}
The bin field is important — it makes your server executable via npx after publishing.
Create the source directory:
mkdir srcStep 2: Create the Server Skeleton (Minutes 2-3) {#step-2-server-skeleton}
Create src/index.ts — this is the entry point for your MCP server:
#!/usr/bin/env node

import { McpServer } from "@modelcontextprotocol/sdk/server/mcp.js";
import { StdioServerTransport } from "@modelcontextprotocol/sdk/server/stdio.js";

// Create the MCP server instance
const server = new McpServer({
  name: "devstats",
  version: "1.0.0",
});

// We will add tools here in the next step

// Start the server using stdio transport
async function main() {
  const transport = new StdioServerTransport();
  await server.connect(transport);
  console.error("DevStats MCP server running on stdio");
}

main().catch(console.error);
Key things to understand about this skeleton:
McpServer is the main class from the SDK. It manages tool registration, request routing, and protocol compliance. You never need to think about the MCP wire format.
StdioServerTransport means the server communicates over standard input/output. This is the most common transport for local MCP servers — the AI client (Claude) spawns your server as a child process and talks to it over stdin/stdout.
console.error for logging, not console.log. Since the server uses stdout for MCP protocol messages, any console.log call would corrupt the protocol stream. Always use console.error for debug output.
That is your complete server skeleton. It compiles, it runs, it just does not do anything yet.
Step 3: Add Your First Tool (Minutes 3-5) {#step-3-first-tool}
Now let us add the get_github_stats tool. Add this between the server creation and the main() function:
import { z } from "zod";

// Tool 1: Get GitHub repository statistics
server.tool(
  "get_github_stats",
  "Get public statistics for a GitHub repository including stars, forks, open issues, and description",
  {
    owner: z.string().describe("GitHub repository owner (e.g., 'anthropics')"),
    repo: z.string().describe("GitHub repository name (e.g., 'claude-code')"),
  },
  async ({ owner, repo }) => {
    const response = await fetch(
      `https://api.github.com/repos/${owner}/${repo}`,
      {
        headers: {
          Accept: "application/vnd.github.v3+json",
          "User-Agent": "devstats-mcp/1.0",
        },
      }
    );

    if (!response.ok) {
      return {
        content: [
          {
            type: "text" as const,
            text: `Error: Could not fetch stats for ${owner}/${repo}. Status: ${response.status}`,
          },
        ],
      };
    }

    const data = await response.json();

    return {
      content: [
        {
          type: "text" as const,
          text: JSON.stringify(
            {
              name: data.full_name,
              description: data.description,
              stars: data.stargazers_count,
              forks: data.forks_count,
              open_issues: data.open_issues_count,
              language: data.language,
              created: data.created_at,
              updated: data.pushed_at,
              license: data.license?.spdx_id || "None",
            },
            null,
            2
          ),
        },
      ],
    };
  }
);
Let me break down the server.tool() call because this is the most important API in the entire MCP SDK:
First argument: "get_github_stats" — The tool name. AI agents use this to decide which tool to call. Keep it descriptive and use snake_case.
Second argument: the description — This is critical. The AI model reads this description to decide whether to use your tool. A vague description means the model will not know when to invoke it. Be specific about what the tool does, what it returns, and when to use it.
Third argument: the Zod schema — Defines the input parameters. Each parameter gets a .describe() call that tells the model what to provide. These descriptions directly impact how well the model uses your tool.
Fourth argument: the handler function — The actual implementation. It receives validated inputs (Zod handles validation automatically) and returns a content array. The content array supports text, image, and resource types. For most tools, you will return text with a JSON-stringified result.
Step 4: Add a Second Tool with External Data (Minutes 5-6) {#step-4-second-tool}
Add the npm downloads tool below the first one:
// Tool 2: Get npm package download statistics
server.tool(
  "get_npm_downloads",
  "Get weekly download count and package metadata for an npm package",
  {
    package_name: z
      .string()
      .describe("npm package name (e.g., '@modelcontextprotocol/sdk')"),
  },
  async ({ package_name }) => {
    // Fetch download counts and package info in parallel
    const [downloadsRes, packageRes] = await Promise.all([
      fetch(
        `https://api.npmjs.org/downloads/point/last-week/${encodeURIComponent(package_name)}`
      ),
      fetch(`https://registry.npmjs.org/${encodeURIComponent(package_name)}/latest`),
    ]);

    if (!downloadsRes.ok) {
      return {
        content: [
          {
            type: "text" as const,
            text: `Error: Could not fetch downloads for '${package_name}'. The package may not exist.`,
          },
        ],
      };
    }

    const downloads = await downloadsRes.json();
    const packageInfo = packageRes.ok ? await packageRes.json() : null;

    return {
      content: [
        {
          type: "text" as const,
          text: JSON.stringify(
            {
              package: package_name,
              weekly_downloads: downloads.downloads,
              period: `${downloads.start} to ${downloads.end}`,
              description: packageInfo?.description || "N/A",
              version: packageInfo?.version || "N/A",
              license: packageInfo?.license || "N/A",
              homepage: packageInfo?.homepage || "N/A",
            },
            null,
            2
          ),
        },
      ],
    };
  }
);
Notice the Promise.all — fetching downloads and package info in parallel is a small optimization, but it demonstrates an important principle: MCP tool handlers are just async functions. You have the full power of Node.js available. Make HTTP requests, read files, query databases, spawn child processes — whatever your tool needs to do.
Step 5: Test with MCP Inspector (Minutes 6-7) {#step-5-test-inspector}
Build the project and test it:
npm run buildNow launch the MCP Inspector — Anthropic's official testing tool for MCP servers:
npx @modelcontextprotocol/inspector node dist/index.jsThe Inspector opens a web interface (usually at http://localhost:5173) where you can:
- See your server's registered tools
- Invoke each tool with test inputs
- Inspect the raw MCP protocol messages
- Verify response formats
Test the get_github_stats tool with owner: "anthropics" and repo: "claude-code". You should see a JSON response with stars, forks, and other stats.
Test the get_npm_downloads tool with package_name: "@modelcontextprotocol/sdk". You should see weekly download numbers.
If either tool fails, the Inspector shows the full error trace. The most common issues at this stage:
Cannot find module— Check thattsconfig.jsonhas"module": "Node16"and your imports use.jsextensions- Network errors — Make sure your machine has internet access (GitHub and npm APIs are public)
- Zod validation errors — The Inspector shows exactly which parameter failed validation
Step 6: Connect to Claude Code (Minutes 7-8) {#step-6-connect-claude-code}
With the server tested, connect it to Claude Code:
claude mcp add devstats -- node /absolute/path/to/devstats-mcp/dist/index.jsNow start a Claude Code session and try:
"How many GitHub stars does the @modelcontextprotocol/sdk have, and what are its weekly npm downloads?"
Claude will invoke both tools, get the numbers, and synthesize a response. No copy-pasting, no tab-switching.
For a deeper dive into how Claude Code uses MCP servers, see our Claude Skills vs MCP Servers comparison — it explains when to build a skill versus when to build an MCP server.
Step 7: Connect to Claude Desktop (Minutes 8-9) {#step-7-connect-claude-desktop}
Edit your Claude Desktop configuration file:
- macOS:
~/Library/Application Support/Claude/claude_desktop_config.json - Windows:
%APPDATA%\Claude\claude_desktop_config.json
Add your server:
{
  "mcpServers": {
    "devstats": {
      "command": "node",
      "args": ["/absolute/path/to/devstats-mcp/dist/index.js"]
    }
  }
}
Restart Claude Desktop. Your tools now appear in the tools menu (the hammer icon).
Step 8: Publish to npm (Minutes 9-10) {#step-8-publish-npm}
Publishing to npm makes your server installable by anyone with a single npx command.
First, make sure the shebang line is at the top of your compiled output. It should already be there from src/index.ts:
#!/usr/bin/env nodeUpdate package.json with proper metadata:
{
  "name": "devstats-mcp",
  "version": "1.0.0",
  "description": "MCP server for GitHub and npm statistics",
  "type": "module",
  "bin": {
    "devstats-mcp": "./dist/index.js"
  },
  "files": ["dist"],
  "keywords": ["mcp", "model-context-protocol", "github", "npm", "devtools"],
  "license": "MIT",
  "scripts": {
    "build": "tsc",
    "prepublishOnly": "npm run build"
  }
}
Build and publish:
npm run build
npm publish
After publishing, anyone can use your server with:
npx devstats-mcpOr add it to Claude Code:
claude mcp add devstats -- npx -y devstats-mcpStep 9: List on Skiln.co {#step-9-list-skiln}
The Skiln.co MCP directory is one of the largest curated directories of MCP servers, with over 18,000 entries. Listing your server there puts it in front of thousands of developers who are actively looking for new tools.
To submit your server:
- Go to skiln.co/submit
- Select "MCP Server" as the type
- Fill in: name, description, GitHub URL, npm package name, install command
- Choose your listing tier — free community listing, Verified ($29), or Featured ($79)
A free listing gets your server into the directory search. A Verified listing adds a checkmark and priority in search results. A Featured listing puts you on the homepage and category pages.
Going Further: Resources and Prompts {#going-further}
Adding More Sophisticated Features
The server we built is intentionally simple. Here are patterns for taking it further:
Resources — In addition to tools, MCP servers can expose resources (read-only data that the AI can access without calling a tool). Resources are useful for documentation, configuration files, or any data the model should have in context:
server.resource(
  "readme",
  "devstats://readme",
  async (uri) => ({
    contents: [
      {
        uri: uri.href,
        mimeType: "text/markdown",
        text: "# DevStats MCP\n\nThis server provides GitHub and npm statistics...",
      },
    ],
  })
);
Prompts — MCP servers can also register prompts — predefined prompt templates that AI clients can offer to users:
server.prompt(
  "compare_packages",
  { packages: z.string().describe("Comma-separated npm package names") },
  ({ packages }) => ({
    messages: [
      {
        role: "user",
        content: {
          type: "text",
          text: `Compare these npm packages by downloads, stars, and maintenance: ${packages}`,
        },
      },
    ],
  })
);
Error handling — Production servers should catch errors gracefully and return structured error messages rather than crashing:
async ({ owner, repo }) => {
  try {
    const response = await fetch(`https://api.github.com/repos/${owner}/${repo}`);
    if (response.status === 404) {
      return {
        content: [{ type: "text" as const, text: `Repository ${owner}/${repo} not found.` }],
        isError: true,
      };
    }
    if (response.status === 403) {
      return {
        content: [{ type: "text" as const, text: "GitHub API rate limit exceeded. Try again in a few minutes." }],
        isError: true,
      };
    }
    // ... handle success
  } catch (error) {
    return {
      content: [{ type: "text" as const, text: `Network error: ${error instanceof Error ? error.message : "Unknown"}` }],
      isError: true,
    };
  }
};
Useful References
- MCP Specification — The full protocol spec. Read it when you need to understand transport details or edge cases.
- MCP TypeScript SDK — The SDK source code. The best documentation is often the types themselves.
- MCP Inspector — The testing tool we used in Step 5.
- Skiln.co MCP Directory — Browse 18,000+ MCP servers for inspiration. See how others have structured their tools.
If you are interested in building skills instead of MCP servers — markdown instruction files that shape Claude's behavior rather than giving it new tools — read our how to build a Claude skill tutorial. For understanding when to use which approach, the Skills vs MCP Servers comparison breaks it down.
Frequently Asked Questions {#faq}
What language should I use to build an MCP server?
TypeScript and Python are the two officially supported languages with first-party SDKs from Anthropic. TypeScript is recommended for most developers because the MCP SDK is mature, the ecosystem is larger (most published MCP servers are TypeScript), and npm distribution makes sharing servers trivial. Python is a strong alternative if your server wraps Python-native tools or libraries.
How long does it take to build an MCP server?
A basic MCP server with one or two tools takes 10-15 minutes from empty directory to working server. A production-quality server with error handling, input validation, comprehensive tool descriptions, and npm packaging takes 1-3 hours. The MCP SDK handles all the protocol complexity, so your time is spent writing the tool logic itself.
Can I build an MCP server without TypeScript?
Yes. Anthropic provides official SDKs for TypeScript and Python. Community SDKs exist for Go, Rust, Java, C#, and Ruby. However, TypeScript and Python have the most documentation, examples, and community support.
How do I test an MCP server locally?
Use the MCP Inspector, an official tool from Anthropic that provides a web-based interface for testing MCP servers. Run npx @modelcontextprotocol/inspector to launch it, then connect to your server. You can invoke tools, inspect responses, and debug issues without needing a full AI client.
Where can I publish my MCP server?
Publish the npm package to the npm registry so anyone can install it with npx. Then list it on the Skiln.co MCP directory, Smithery, PulseMCP, and the awesome-mcp-servers GitHub repository for maximum visibility. The Skiln.co directory alone gets thousands of developers browsing for new MCP servers daily.
What is the difference between an MCP tool and an MCP resource?
Tools are functions the AI model can invoke with arguments — they perform actions and return results. Resources are read-only data sources the model can access for context. Think of tools as verbs (do something) and resources as nouns (read something). Most MCP servers primarily use tools. Resources are useful for exposing documentation, configuration, or reference data.
Ready to explore what the community has built? Browse 18,000+ MCP servers on Skiln.co. For data-specific servers, see our guide to the best MCP servers for data engineers.